Professional Roof Flashing Repair in Coral Springs, FL
Roof flashing is the sheet metal installed wherever your roof meets a wall, changes direction, or surrounds a penetration. When flashing fails — from corrosion, thermal movement, or storm displacement — water enters at the exact points the roofing material can't protect on its own. We inspect, repair, and replace all types of roof flashing across Coral Springs and Broward County.
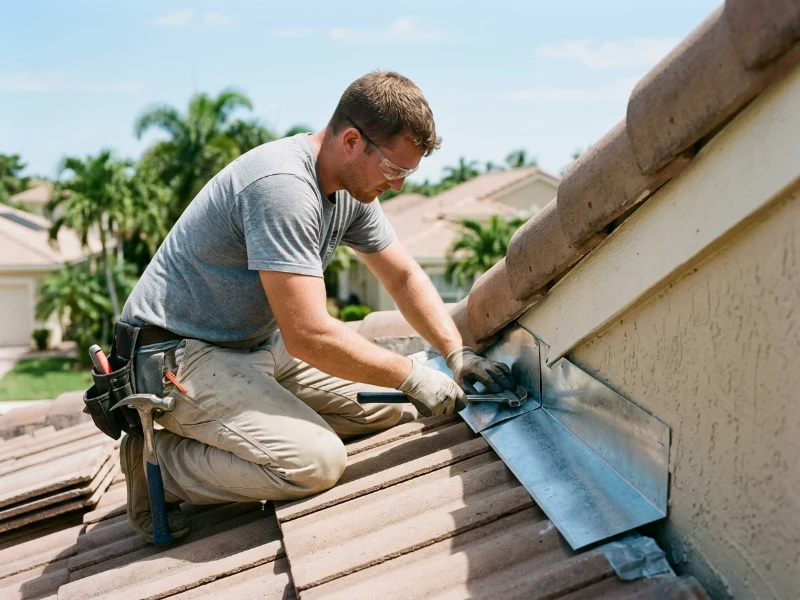
Signs Your Roof Flashing Has Failed
Flashing failures are one of the most common causes of roof leaks — yet they're often the hardest for homeowners to identify from the ground. These signs indicate your flashing may be compromised.
Water stains appearing where walls meet the ceiling
Leaks at the wall-ceiling junction — rather than mid-ceiling — frequently trace back to failed step or counter flashing at roof-to-wall transitions. The water runs down the wall framing before showing as a stain, making the entry point difficult to locate without roof-level inspection.
Leaks around chimneys, skylights, or dormers
These architectural features require the most complex flashing details. Counter flashing, step flashing, headwall flashing, and cricket (saddle) construction must all work together. Failure at any single point in this system allows water behind the roofing material.
Visible rust, corrosion, or separated metal on the roof
Corroded flashing loses its structural integrity and can no longer create a watertight seal. Rust staining on the roof surface or fascia below the flashing indicates ongoing deterioration. In coastal Broward County, salt air accelerates corrosion on uncoated steel flashing.
Dried, cracked, or missing caulk along flashing edges
Sealant used at flashing terminations dries out and cracks under UV exposure. When this sealant fails, it opens a pathway for water — especially at counter flashing top edges and drip edge terminations. Layers of old caulk applied over previous failures indicate an ongoing, unresolved problem.
What You Can Observe From the Ground
Most flashing details are difficult to evaluate without roof access, but several indicators are visible from ground level or inside the home.
Look at drip edge alignment along the eaves
Drip edge flashing should extend beyond the fascia and direct water into the gutter. If it's bent, pulled away, or missing sections, water can run behind the gutter or down the fascia — causing wood damage and soffit staining.
Examine where walls meet the roofline from outside
Look for visible gaps between the wall surface and the flashing metal. If you can see daylight or the flashing has pulled away, wind-driven rain has a direct entry point into the wall assembly.
Check for rust staining on the roof surface or walls
Orange-brown streaks running down the roof or wall below flashing locations indicate corroding metal. This is particularly common with galvanized steel flashing in Coral Springs' humid, salt-influenced air.
Note where interior leaks correlate with roof transitions
Map any interior water stains to the roof features above them. Stains below where a second story meets a lower roof, around chimneys, or near skylights strongly suggest flashing failures rather than roofing material issues.
Common Flashing Failure Points
Every roof has multiple flashing details, each serving a specific function. Understanding the different types helps explain where and why leaks occur at these critical junctions.
Step & Counter Flashing
Step flashing interlocks with each shingle course at wall transitions. Counter flashing covers the step flashing top edges, typically embedded in the wall or mortar joint. When either fails, water enters the wall cavity behind the roofing material.
- Separated counter flashing pulling from the wall
- Missing step flashing pieces behind lifted shingles
- Water stains on interior walls at roof transition points
Valley Flashing
Valley flashing handles the concentrated water flow where two roof slopes meet. Corroded, dented, or improperly lapped valley metal creates leak points at the roof's highest-volume drainage paths. Debris accumulation in valleys accelerates corrosion.
- Rust or perforation holes in valley metal
- Water entering at valley-below locations
- Debris trapping moisture against the flashing surface
Drip Edge Flashing
Drip edge runs along the eaves and rakes, directing water away from the fascia and into the gutter. Wind can bend or displace drip edge during storms. Missing or damaged drip edge allows water to wick back under the roofing material and down the fascia, causing wood rot and paint failure.
- Fascia board rotting or paint peeling below the roofline
- Drip edge bent outward or missing sections
- Water running behind gutters during rain
Chimney & Skylight Flashing
Chimneys and skylights require flashing on all four sides with proper corners and a cricket (water diverter) on the uphill side. This is the most complex flashing detail on most residential roofs. Failure at any corner or transition point creates a leak path that can be difficult to trace.
- Leaks appearing near chimney or skylight during rain
- Cricket damaged or missing behind chimney
- Corner pieces separated or improperly overlapped
Headwall Flashing
Where a roof slope terminates against a vertical wall (common on two-story homes and additions), headwall flashing diverts water away from the wall junction. Failed headwall flashing sends water into the wall framing — causing hidden structural damage that may not show until mold or rot has advanced significantly.
- Water damage inside the wall at second-story transitions
- Exterior stucco or siding deterioration at the roofline
- Musty odors in rooms below the roof-wall junction
Parapet & Edge Metal (Commercial)
On flat and low-slope commercial roofs, edge metal and parapet coping cap the membrane termination at the roof perimeter. Wind lifts coping, thermal movement separates joints, and corroded drip edges allow water behind the membrane at the roof's most exposed edges.
- Coping joints separated or sealant failed
- Edge metal bent or displaced by wind
- Water intrusion along exterior walls below the roofline
Why Sealant Alone Won't Fix Failed Flashing
When homeowners or handymen notice a leak near a wall transition or chimney, the instinct is often to apply roofing sealant. A thick bead of caulk along the flashing edge seems like a logical solution. But sealant is a maintenance material — not a structural waterproofing component.
Flashing works by directing water flow mechanically. Each piece overlaps the one below it, and the roofing material overlaps the flashing, creating a shingled drainage path. When that physical overlap is compromised — by corrosion, displacement, or improper installation — sealant can't replicate the function. It fills a gap temporarily, but UV exposure, thermal movement, and water pressure will eventually open it again.
Effective flashing repair means removing the failed metal, installing properly sized and shaped replacement flashing with correct overlap, and integrating it with the surrounding roofing materials. It's more involved than a caulk application — but it addresses the actual cause rather than temporarily masking it.
How We Diagnose and Repair Flashing
Flashing repair requires identifying the specific failure point, understanding how the flashing integrates with the roofing system, and replacing the failed component with properly fitted metal.
Identify the Flashing Type and Failure Mode
We inspect all flashing details on the roof — step, counter, valley, drip edge, headwall, and penetration flashings. We determine the metal type, assess corrosion levels, check sealant condition, and identify where the flashing has separated, corroded, or been displaced by wind.
Correlate Exterior Findings with Interior Leaks
We map the flashing failure locations to the interior leak patterns reported by the homeowner. Water can travel significant distances along framing and sheathing before appearing as a ceiling stain — so correlating exterior and interior observations is essential for accurate diagnosis.
Remove Failed Flashing and Prepare the Substrate
We remove the corroded or damaged flashing, clean the substrate, and inspect the roofing material, underlayment, and any wall surfaces that the flashing contacts. If the substrate beneath the flashing has sustained water damage, we address that before installing the replacement.
Install Replacement Flashing with Proper Integration
New flashing is cut, bent, and installed with correct overlap relative to the roofing material. Counter flashing is secured into wall reglets or mortar joints. Valley flashing is lapped for continuous water flow. Sealant is applied only at termination points — not as a substitute for mechanical waterproofing.
Flashing Repair Scope Based on Damage Extent
Roof Flashing Repair FAQ
Flashing is sheet metal (typically aluminum, galvanized steel, or copper) installed at transitions where the roof meets vertical surfaces — walls, chimneys, skylights, dormers, and valleys. It directs water away from these vulnerable joints. When flashing fails, water enters at the exact points where the roof system changes direction.
Several factors can cause premature flashing failure: thermal expansion and contraction separating the metal from the sealant, improper installation leaving insufficient overlap, incompatible metals causing galvanic corrosion, or sealant that degrades under Florida's UV and heat exposure faster than expected.
In limited cases, minor sealant maintenance can extend flashing life temporarily. However, sealant is not a structural substitute for properly installed flashing metal. Over-reliance on sealant — especially on flashing that has corroded, separated, or been improperly installed — typically leads to recurring leaks. Replacement is usually the more reliable long-term solution.
Leaks that appear on walls, around chimneys, near skylights, or at the junction where a second-story wall meets a lower roof section are often flashing-related. Interior stains that start at the wall-ceiling junction rather than mid-ceiling are another indicator. A professional inspection can confirm whether the flashing or another component is responsible.
Ideally, yes. Flashing is integrated with the roofing material during installation — step flashing interlocks with each shingle course, for example. Reusing old flashing under new roofing materials risks leaving corroded or bent metal in place that may fail shortly after the new roof is installed.
Leak at a Wall, Valley, or Chimney? It's Likely the Flashing
If you're seeing water stains near roof transitions, walls, or architectural features, contact us for a professional flashing inspection. We'll identify the specific failure point, explain what's needed, and provide a written repair estimate — before any work begins.