Professional Roof Leak Repair in Coral Springs, FL
A ceiling stain doesn't always tell you where the water is getting in. We trace every leak back to its actual entry point on the roof surface — then repair the source, not just the symptom. Serving residential and commercial properties throughout Coral Springs and Broward County.
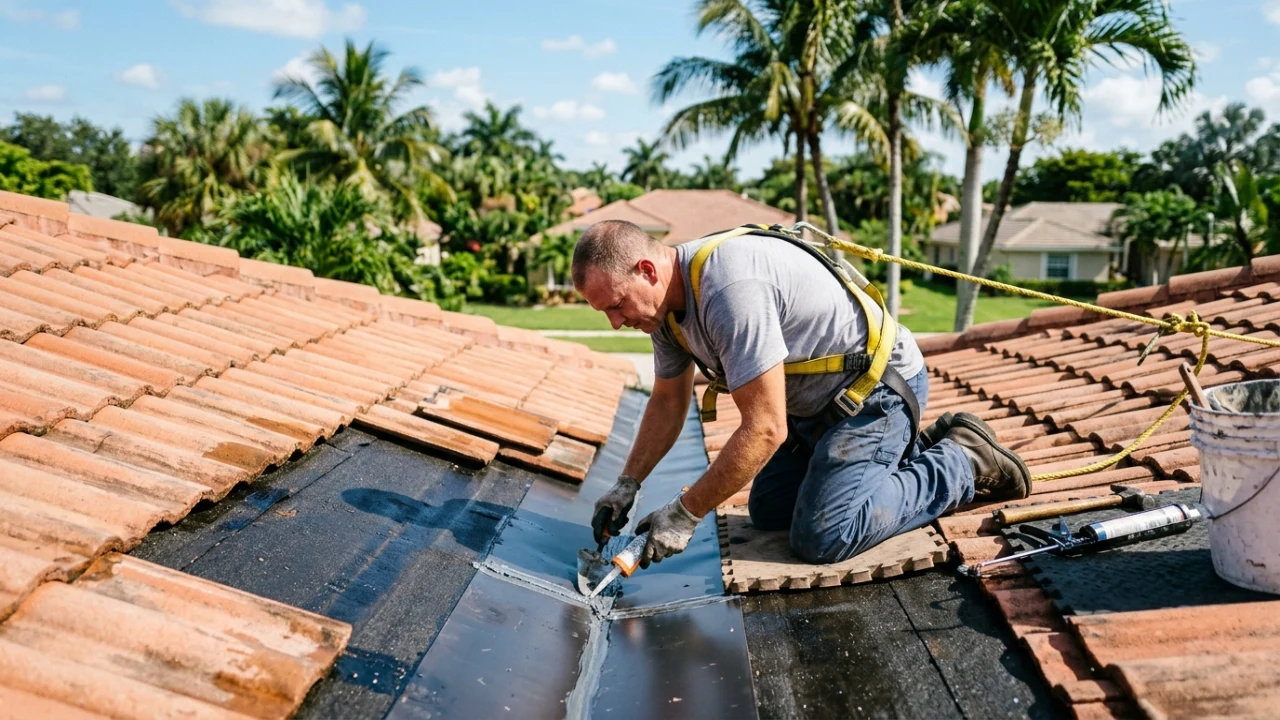
Signs Your Roof May Have an Active Leak
Not every leak announces itself with a dramatic drip from the ceiling. Many develop gradually, leaving subtle clues that are easy to dismiss until the damage spreads further into the building envelope.
Brownish rings or discoloration on ceilings
Circular or irregular stains on drywall are among the most recognizable signs of moisture reaching the interior from above. These marks tend to darken after each rain event, though the stain location rarely aligns with the actual roof entry point.
Active dripping during or shortly after rainfall
Water dripping through a ceiling or light fixture during a storm indicates a direct breach in the roofing system. The breach may involve damaged flashing, a cracked tile, lifted shingles, or a failed seal around a roof penetration.
Persistent damp or musty smell in upper rooms
A lingering musty odor — particularly in bedrooms, closets, or attic spaces on the top floor — can signal trapped moisture within the ceiling assembly. This often means water has been accumulating for weeks or longer without producing a visible stain.
Paint bubbling, peeling, or separating from surfaces
When paint or drywall finish begins to blister or pull away from the substrate, moisture is present behind it. This is a secondary symptom that suggests water has been reaching the wall or ceiling area over a sustained period.
Interior Signs You Can Safely Evaluate
Before scheduling a professional evaluation, there are several things you can check from inside the home without climbing on the roof. These observations help narrow the inspection scope and save time during the on-site visit.
Walk through upper-floor rooms after heavy rain
Look for new ceiling discoloration, damp spots on drywall, or soft areas that yield under light pressure. Fresh evidence after a storm is the most useful clue for tracing the entry point.
Examine accessible attic spaces
If your attic is safely accessible, look for daylight through the roof boards, dark staining on the underside of the deck, damp insulation, or water trails along rafters and trusses.
Note when moisture appears
Does the leak only show during heavy storms? Only with wind from a certain direction? During every rain? This pattern helps identify whether the failure involves wind-driven rain exposure or a direct material breach.
Inspect walls near the roofline
Water entering through failed step flashing or roof-to-wall transitions can travel down interior wall cavities, causing staining or bubbling well below the actual roofline.
Check corners, closets, and behind furniture
Leaks sometimes travel to areas homeowners rarely monitor. Interior closets, ceiling corners behind tall furniture, and garage ceilings are common spots where moisture evidence goes unnoticed for extended periods.
Where Roof Leaks Typically Originate
Certain roof components are more vulnerable to failure than others — particularly in Coral Springs, where heavy seasonal rainfall, intense UV exposure, and hurricane-force winds accelerate material deterioration across every roofing system.
Roof Valleys
Valleys concentrate large volumes of runoff during heavy rain. When valley flashing corrodes, lifts, or loses its seal, water can enter beneath the roofing material without obvious surface damage.
- Corroded or worn valley metal
- Debris accumulation blocking flow
- Failed sealant along valley edges
Damaged Roofing Materials
Missing, cracked, or wind-lifted shingles and tiles create direct pathways for water. In South Florida, constant UV exposure and thermal cycling weaken roofing materials faster than moderate climates.
- Missing or displaced shingles or tiles
- Cracked or split roof surfaces
- Exposed underlayment or decking
Roof Penetrations
Every pipe, vent, exhaust fan, or equipment mount that passes through the roof surface creates a potential failure point. The rubber collars, sealants, and flashing around these openings deteriorate under Florida sun.
- Cracked or hardened pipe boots
- Failed sealant around vent caps
- Loose or corroded penetration flashing
Flashing Transitions
Flashing protects the junctions between the roof surface and walls, chimneys, skylights, and other structures. When it lifts, corrodes, or separates, water can infiltrate behind the roofing material without any obvious exterior evidence.
- Lifted or separated step flashing
- Deteriorated counter flashing seals
- Corroded metal at wall transitions
Flat or Low-Slope Sections
Properties with flat or low-slope roof areas face additional risk from ponding water and membrane deterioration. These sections don't drain as effectively as pitched roofs and require specialized attention during leak diagnosis.
- Standing water 48+ hours after rain
- Membrane punctures or open seams
- Deteriorated edge flashing details
Previously Patched Areas
Temporary patches applied during or after past storms may conceal ongoing damage. Roof cement or surface sealant applied without addressing the underlying failure can mask progressive deterioration beneath the patch.
- Thick layers of dried roof cement
- Mismatched materials from prior repairs
- Recurring moisture near old patch sites
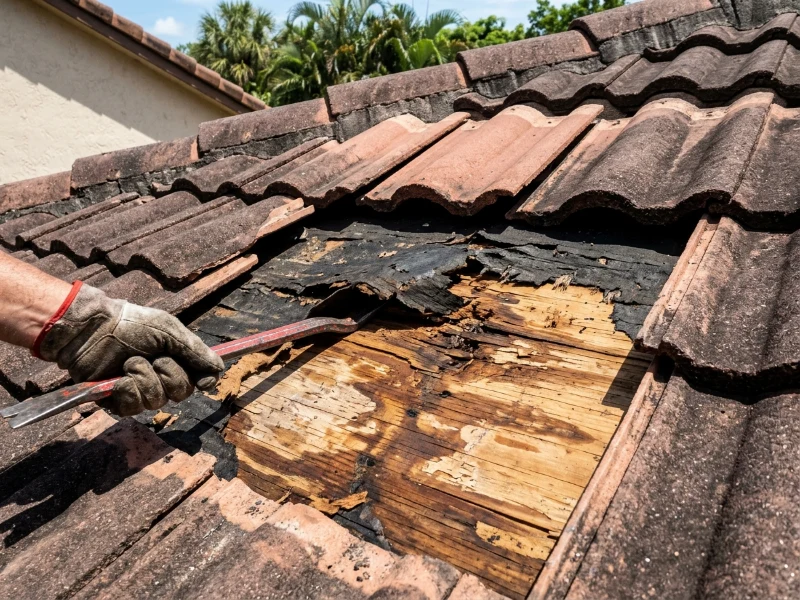
Why the Ceiling Stain Doesn't Mark the Leak
One of the most common misunderstandings about roof leaks is that the ceiling stain sits directly below the point where water enters the roof. In practice, water frequently travels along the roof deck, follows rafters or trusses, runs across sheathing, and may even wick through insulation before it drops through to the living space below.
In many Coral Springs homes — especially those with open truss-framed roof structures and long, continuous plywood spans — the actual entry point on the roof surface can be several feet from where the stain appears on the ceiling. Applying sealant to the roof directly above the stain may not resolve the leak if the real failure is elsewhere.
This is why effective leak repair in this area starts with methodical tracing rather than assumptions. A professional roofing evaluation in Coral Springs follows the water's path from the interior evidence back to the confirmed roof surface failure.
How We Locate and Repair Roof Leaks
Every leak repair starts with structured diagnosis. We identify the actual failure point before recommending any work — so the repair addresses the cause, not just the visible symptom.
Examine Interior Water Evidence
We start inside the home, documenting ceiling stains, moisture trails, damp spots, and any visible water paths. When attic access is available, we inspect the underside of the roof deck for water tracks on rafters, stained sheathing, or saturated insulation — these clues help narrow the search area before we go up on the roof.
Inspect Exterior Roof Components
On the roof surface, we systematically evaluate the areas most likely responsible — flashing details, penetration seals, valleys, ridge and hip areas, and material condition. Each potential entry point is assessed based on its proximity to the interior evidence and its current condition.
Confirm the Leak Path
We connect the exterior findings to the interior symptoms, tracing how water moves from the entry point through the roof assembly to the visible damage. This confirmation step prevents unnecessary work on areas that may look worn but aren't actually contributing to the leak.
Complete the Repair and Evaluate Surrounding Areas
Once the source is confirmed, we complete the repair and inspect adjacent roof components for developing vulnerabilities. A localized fix is only durable if the surrounding materials, underlayment, and flashing remain sound — otherwise, the next heavy rain may reveal a new entry point nearby.
Repair Scope Based on the Leak Source
The scope of repair depends on what's causing the leak and how long moisture has been present. Here's what to expect based on typical findings.
Roof Leak Repair FAQ
We begin with the interior evidence — ceiling stains, moisture trails, and damp insulation — then move to the roof surface to examine penetrations, flashing, valleys, and material condition. Because water often travels along the deck before dropping through, the visible stain and the actual entry point are frequently several feet apart.
It can. A small stain may be the only visible sign of water that has been traveling along the roof structure for some time. The size of the stain does not reliably predict the severity of the roof failure — an inspection of the actual entry point is necessary to determine the scope of the problem.
Certain failure points only allow water entry under specific conditions. Wind-driven rain can push water beneath shingles, tiles, or flashing that would normally shed a light downpour. A compromised valley or partially lifted flashing detail may only channel water inward when rainfall volume exceeds what the damaged area can handle.
Surface sealant may temporarily slow water entry, but it rarely addresses the underlying cause. If the failure involves lifted flashing, compromised underlayment, or deteriorated materials beneath the roof covering, sealant applied on top can actually mask the problem and delay a proper repair — potentially allowing more deck damage to develop.
Most single-point leak repairs are completed within the same day once the source is confirmed. More involved repairs — those requiring flashing replacement, decking access, or multiple material corrections — may require additional time depending on the scope and material availability.
Noticing Water Stains or Moisture? Schedule a Roof Evaluation
If water is entering your property through the roof — or you suspect a developing leak based on ceiling stains, damp areas, or persistent odors — contact us to schedule a professional evaluation. We'll trace the source, explain what's involved, and provide a written estimate before any repair work begins.